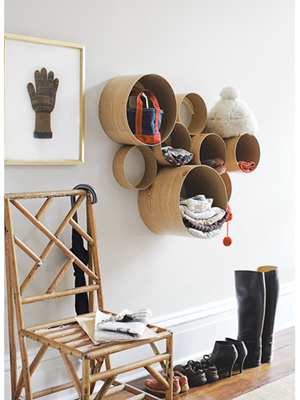
The idea of this striking DIY wall storage system belongs to a dynamic design duo Kathleen Hackett and Stephen Antonson. It’s based on using of cardboard tubes, looks really chic and is quite flexible.
Materials and tools
- Two four-foot-tall cardboard tubes, one measuring 10 inches wide and the other 12 inches wide
- Contact paper
- Washers, bolts, plastic anchors, screws
- 1-2 inch wood planks
- Braces
- Jigsaw
- Drill
- Utility knife
Instructions
- Cut each cardboard tube into smaller tubes of varying heights using a jigsaw.
- Cover the outside of each tube you got with contact paper. Cut away any excess paper with a utility knife.
- Arrange the future tubes composition on the floor. Fastern them all together with washers and bolts
- To create load-bearing braces, slide a piece of wood that’s at least an inch thick underneath one of the topmost tubes. Trace an arc along the top half of the tube’s interior onto the wood. Measure down two inches and draw another arc that connects to the first, making a crescent shape. Repeat for all the tubes on the top row.
- Use a jigsaw to cut out crescents from wood, following the shapes you drew. Drill a hole into the center of each shape.
- Position the tubes on your wall. Lightly trace top arcs of each topmost tube on the wall with pencil. Set all tubes aside and place braces so they align with drawn arcs. Drill holes to hold them and tap plastic anchors there.
- Screw all braces to the wall and set the tubes onto them.
- Fasten the tubes to the braces using screws.
Enjoy your modern and stylish wall storage system that is designed to accomodate your things.
