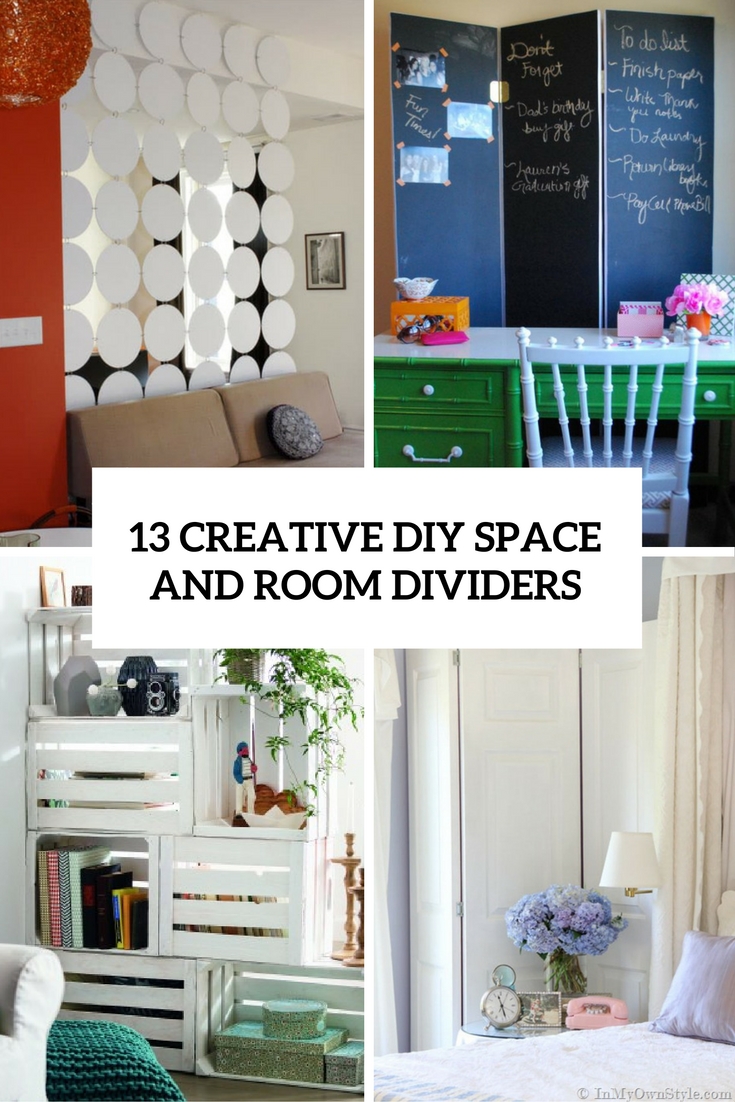
Today there are many open-plan homes, which despite the design still need some separating. A room divider is great idea to do that, and you needn’t buy one, let’s DIY it!
The first craft is pretty easy: it’s a hanging screen made from old vinyl LPs. Attaching them to each other is up to you, try different ways.
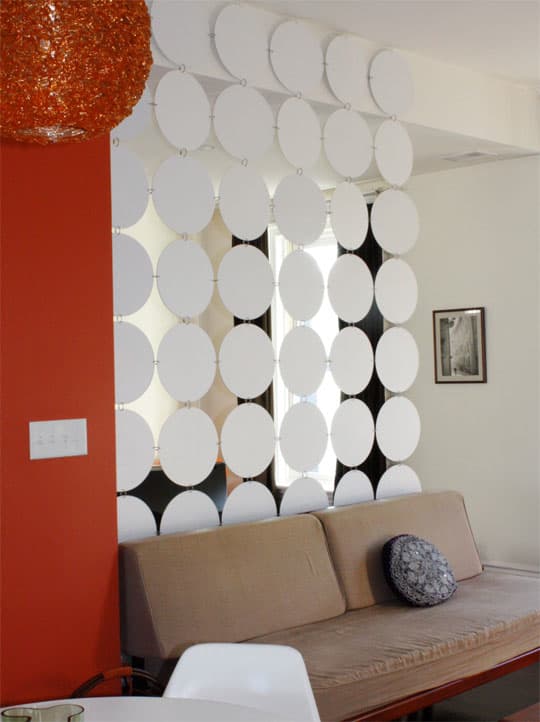
DIY hanging space divider from old vinyl LPs (via www.apartmenttherapy.com)
If you have basic woodworking skills, you can create this simple, decorative room divider in a weekend. Here it’s bold orange and there’s a window in it but you can vary the design and the finish.
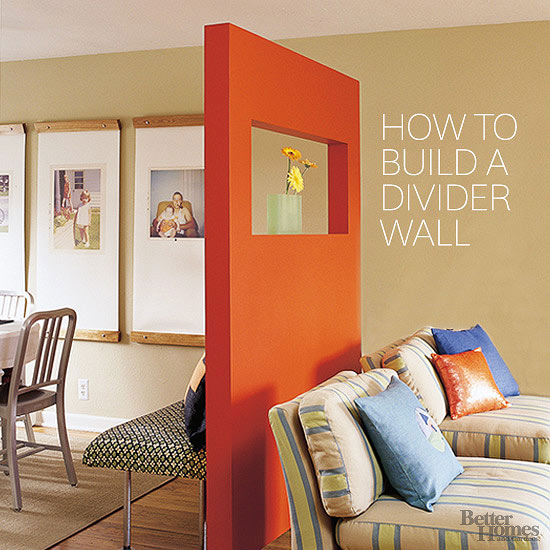
DIY bold orange free-standing divider wall (via www.bhg.com)
This screen was built of pipes and then covered with fabric. You can actually cover it in various other ways – with cardboard, paper or feathers, just choose the materials and colors that match your interior.
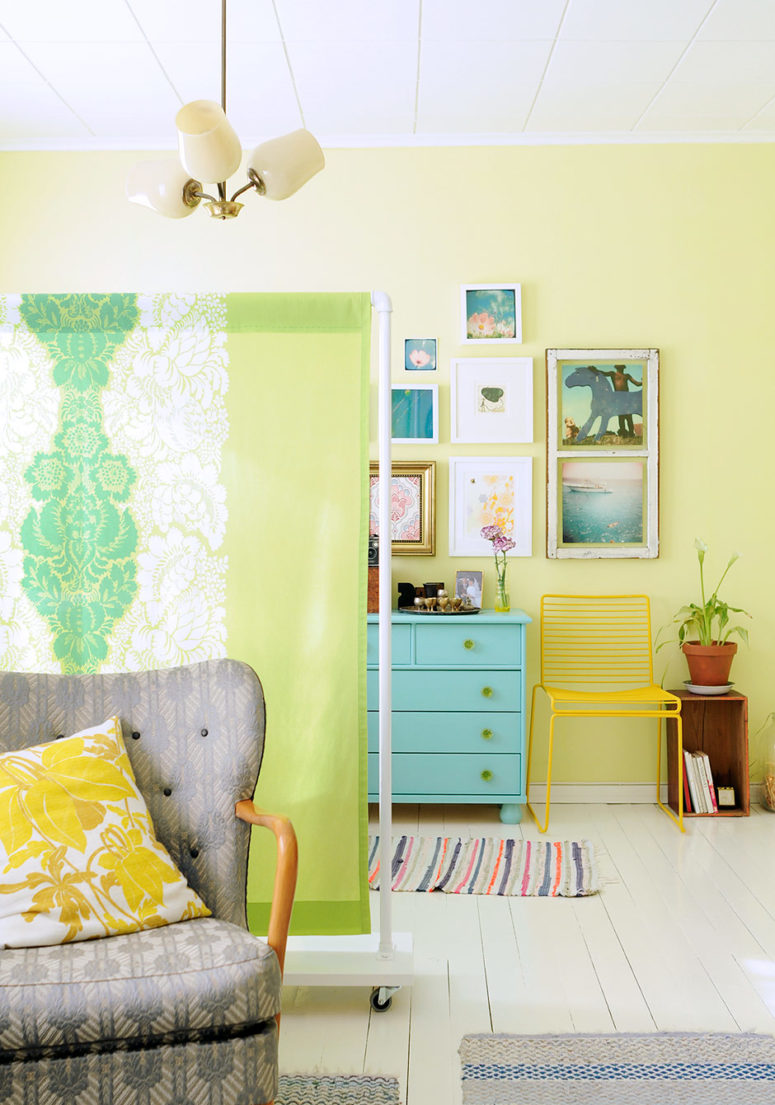
DIY pipe divider with a fabric screen (via www.kootutmurut.com)
A space divider can be functional, and this one proves it. This space divider is made of several crates, which act as shelves at the same time. Paint or finish the crates the way you like, then just screw drive them to each other creating a construction you like. Voila!
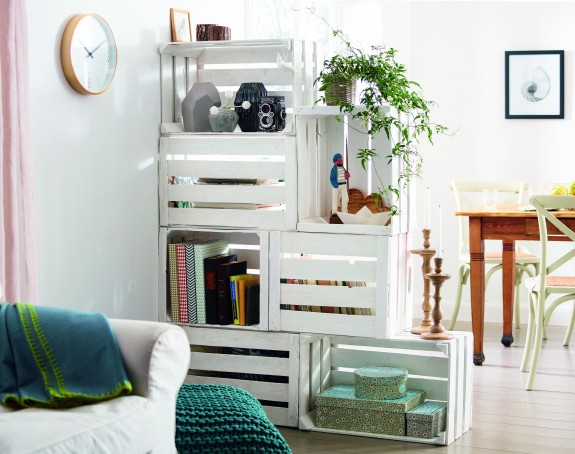
DIY whitewashed crate space divider with storage (via homestory.rp-online.de)
One more hanging divider idea is here! This divider is made of painted hardwood piece that are connected with chain and hooks. Finish them according to your room décor.
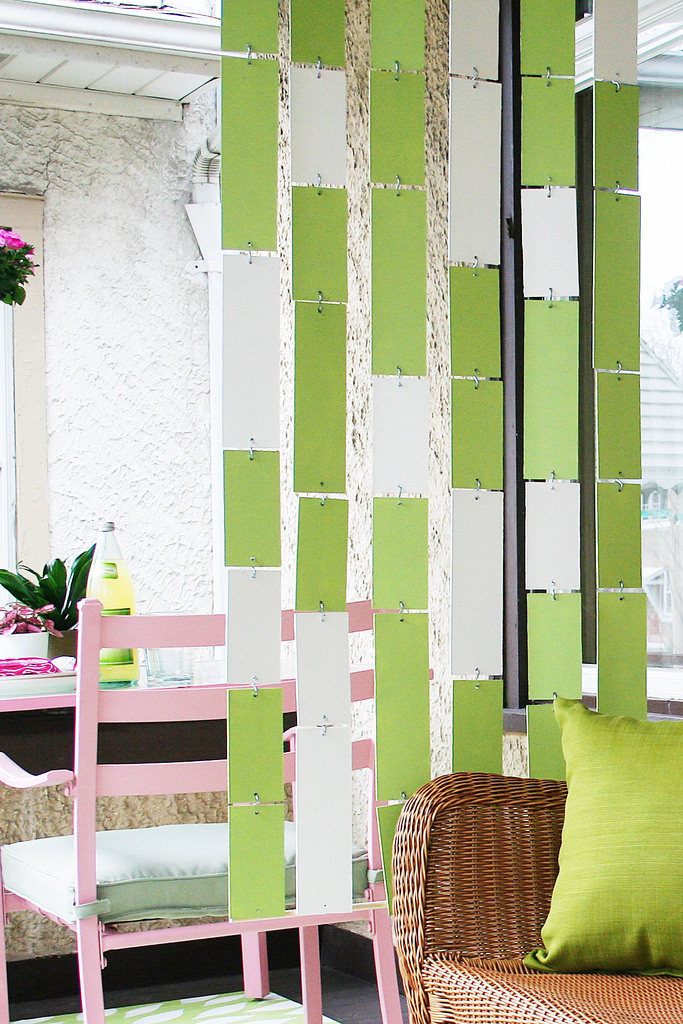
DIY hanging divider of hardwood pieces and chain (via makingitlovely.com)
A multipurpose room divider is right what we need! it’s an MDF board turned into a functional foldable chalkboard divider that can act as a memo board for your kids when you don’t need it.
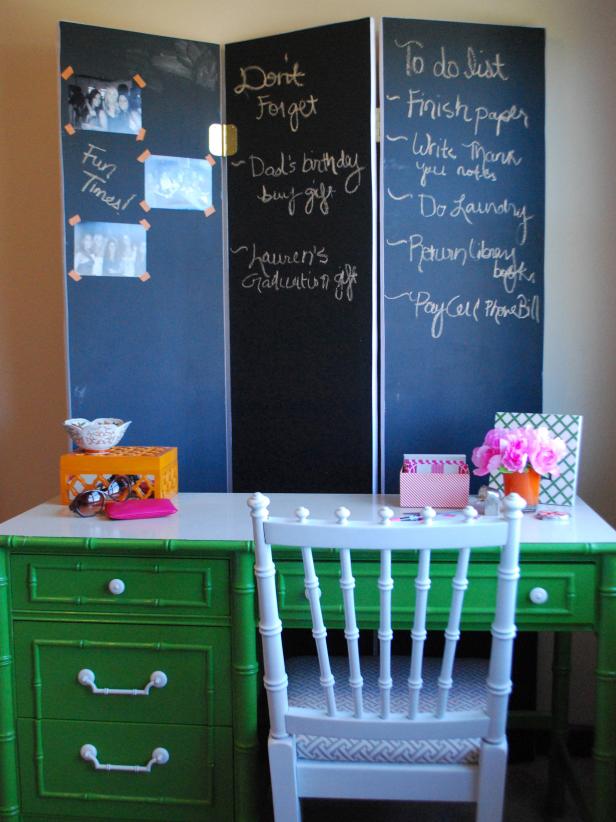
DIY multifunctional chalkboard space divider (via www.hgtv.com)
A usual boring room divider was turned into a pretty airy one. All you need to do is to remove the existing panels and then just add chicken wire. Chicken wire is great for attaching pictures, memos, photos and it creates separation but not too much.
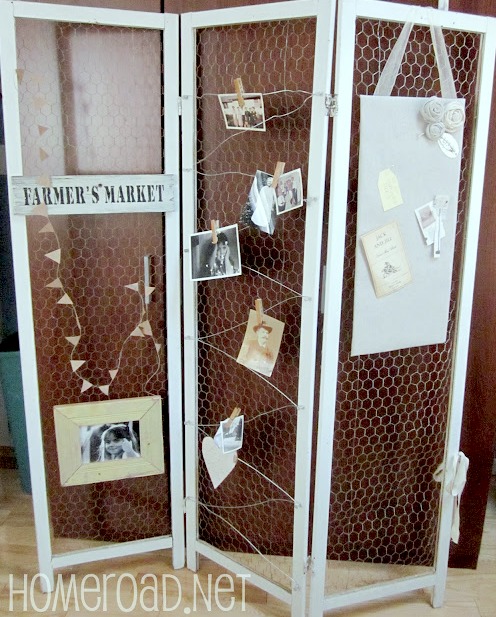
DIY chicken wire screen for dividing the space (via www.homeroad.net)
This chevron room divider can act as a dressing screen, and it’s foldable, so you can take it and move to any place you need. Building it is easy: just attach fabric to the frames you have or create your own frames if you don’t have those that satisfy you.
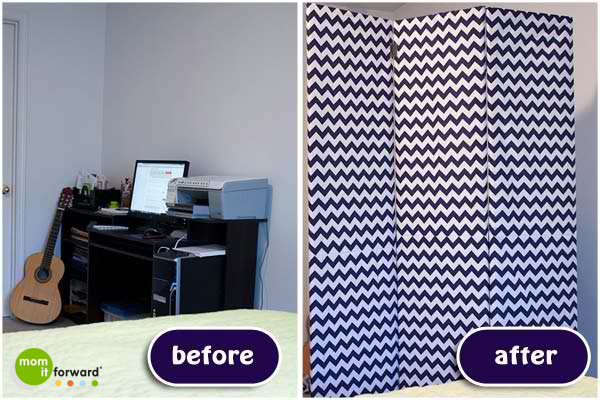
DIY chevron room divider and dressing screen (via momitforward.com)
A couple of old doors can become a cool vintage room divider or screen. Attach them to each other making it foldable and finish the way you like.
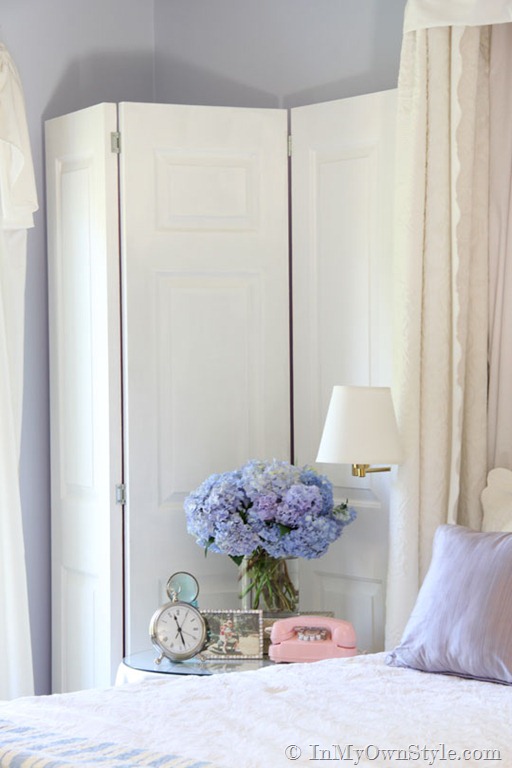
DIY pink folding screen made of vintage doors (via inmyownstyle.com)
This is a Shoji Screen room divider with cardboard, an inexpensive and creative piece that can fit many interiors. Here you’ll see painted bamboo but of course you can change the look and paint what you like and want to.
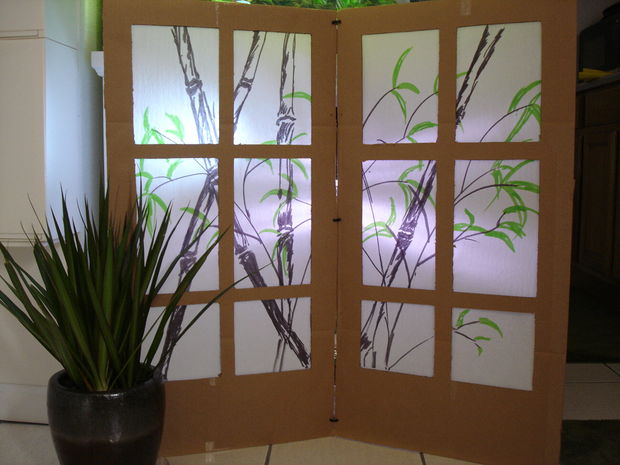
DIY Shoji screen with bamboo painted on it (via www.instructables.com)
Louvered bi-fold doors became the main supply for this craft. Sand and finish them how you want, and then just attach to each other and voila, your screen is ready.

DIY room divider from louvered bi-fold doors (via www.instructables.com)
This super creative and unique room divider is made of cardboard, and it’s textural and voluminous, I like it very much but to create it you’ll need some time and efforts, it’s worth it!

DIY cardboard room divider with a texture and volume (via www.instructables.com)
The last tutorial for today is made of Expedit by IKEA. You’ll need 24 12 x 12 canvases from Blick which you will paint in various shades. Put two eye hooks in each cubby and two matching cup hooks on the top of each canvas. The canvases swing open for easy access.
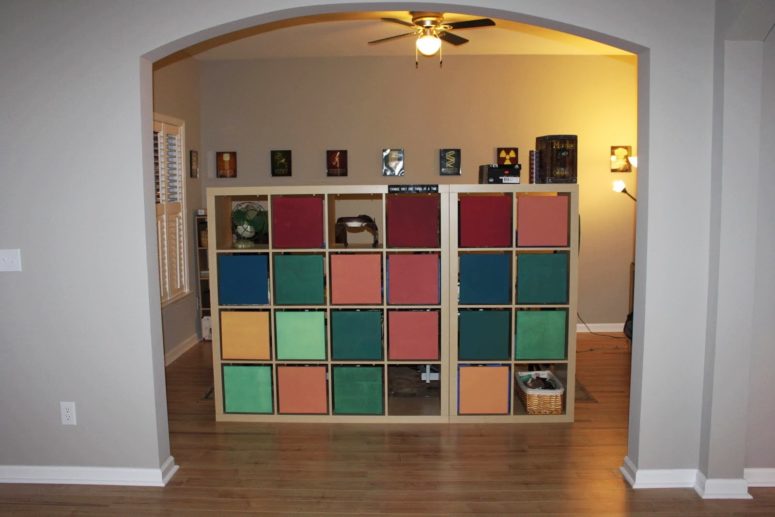
DIY IKEA Expedit room divider with drawer compartments (via www.ikeahackers.net)
